
Will replacing my leaf springs for my Spindrift Day Sailer’s trailer be a do it yourself job? Yes, of course, you would not have found this post if it wasn’t. They are available at lots of trailer shops or online. The challenge is to get through the super rusted hardware to remove the leaf springs. Frankly, I was surprised that they survived the journey from New Jersey to New York when I purchased the boat. Fortunately they did. This particular spring style is called a slipper. It has a mild curve on one end, and is bolted through on the other end. So, along with the slipper, I need to get the U-Bolt and hardware, plus the through bolt.
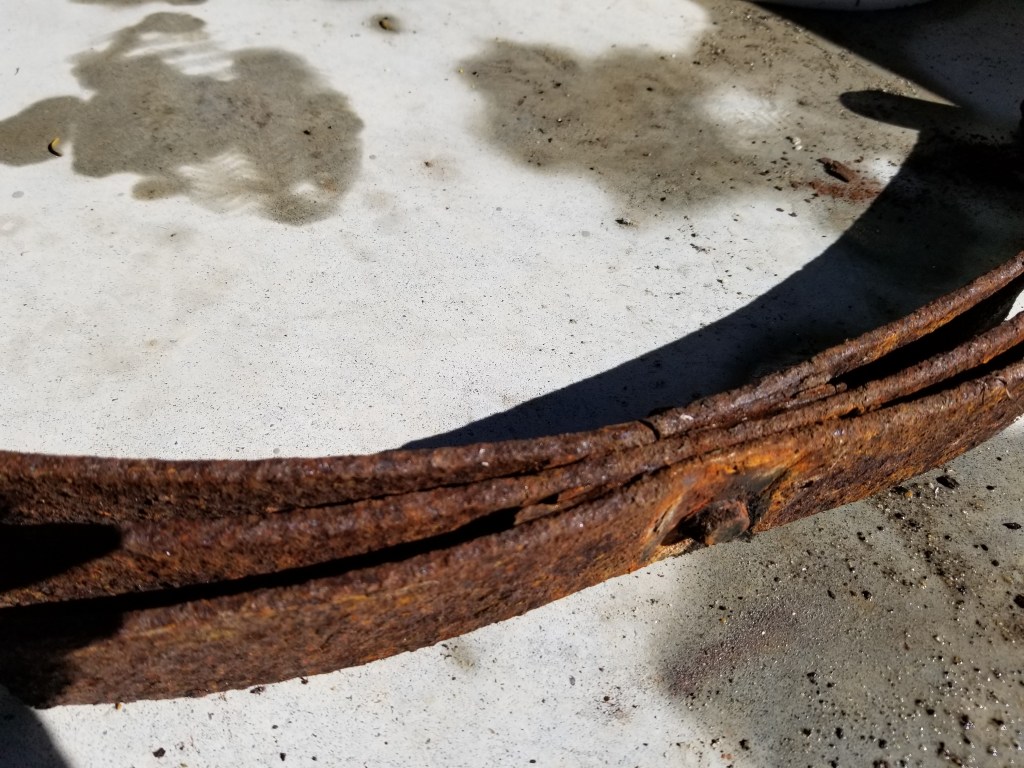
After I started into this project, I realized that one of the leaves of the springs on one side had completely broken off. On the other side, two of the leaves were cracked.

A wise community member from a DaySailer facebook group suggested using a sawzall blade in my Ryobi cordless reciprocating saw to cut the bolt. I did this on the second side of the trailer and it was substantially less work than trying to remove the rusty nuts. I also purchased a longer arm socket wrench for the through bolt since I could not easily cut it. See pick below.
The dimensions of the spring change when it is unsprung. The best option is to remove the spring and take it to a trailer shop where they can match it up with an identical or similar spring. I purchased two new springs, two through bolts and nuts, and mounting plates with 4 bolts per side to replace the original 2.

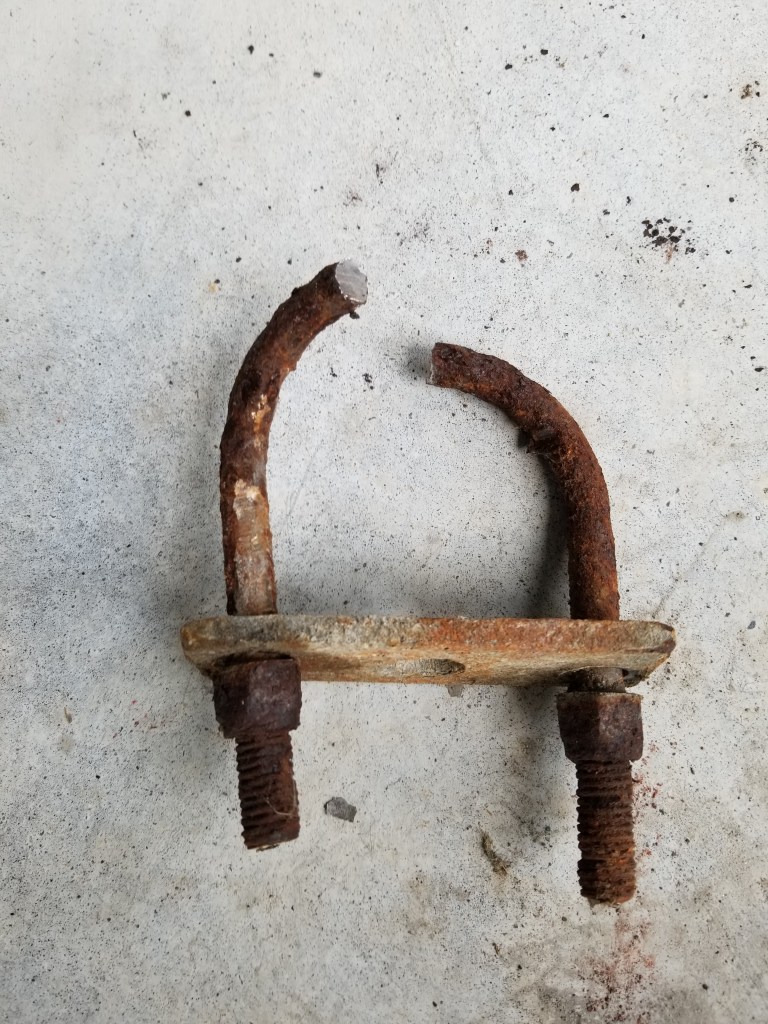
Step 1: Removing the old leaf springs. After blocking the trailer up so the wheels could be removed, there were only three bolts to remove, two for the U-bolt shown in the photo below, and one for the through bolt that attaches the leaf springs to the trailer. I sprayed them heavily with WD-40 for a few weeks, hoping that would help. Perhaps it helped a little, but it was still a beast to get them off. I used a socket wrench and a box wrench and this was honestly the most difficult part of the job.
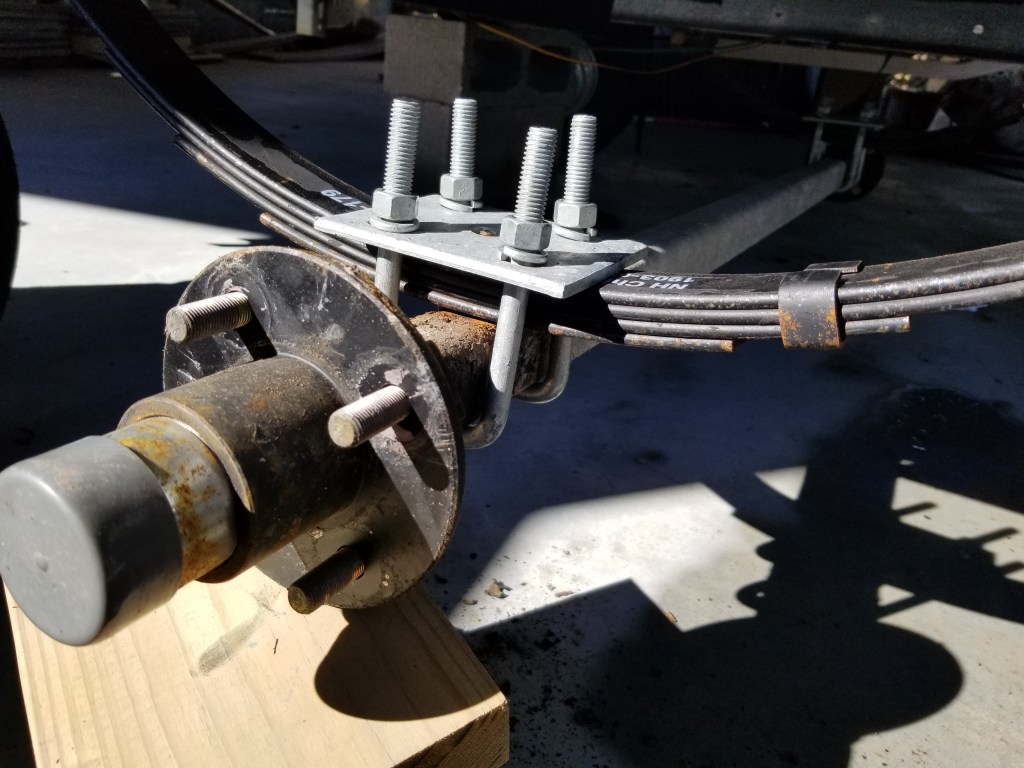
Step 2: Fitting the new leaf springs. The new springs were very similar to the original springs in size. However, the main issue was that the through hole to hold them onto the trailer was slightly bigger than the original, requiring me to drill out a fraction of the original hole from the trailer to fit the larger bolt.
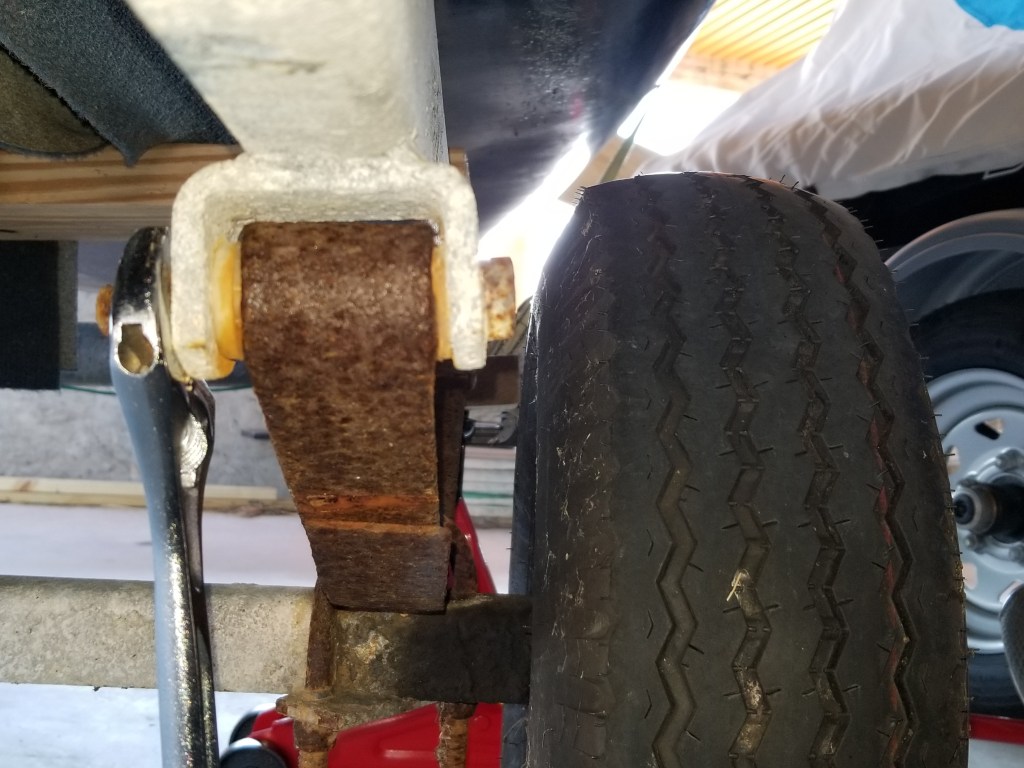
Step 3: Installing the fastening bracket. The fastening hardware was much more robust. However, the axle did not center in the same place as the original spring. This meant that I could not replace just one side and put it all back together or one side of the trailer would be further forward than the other and the trailer would not track straight. In fact, the original mounting hardware would not let me fix the new side so I left that side loosely fitted until I could complete the other side.
Here is the finished result. In hindsight, I should have also replaced the entire axle for a new one while I had it all off. It was a lot of work to get to this point and would have been nice to have it new from end to end. Regardless, I’m happy it w
Step 4: Can I Paint Leaf Springs? After storing the springs outside for just a few weeks in a moist, chilly NY climate, I noticed quite a bit of surface rust already appearing through the factory black paint. I bought a can of rustoleum semi-glass black and gave them a light spraying. Am hoping that this will buy a few extra years of life before I have to go through this again!

Leave a comment